QR code services

The QR Check-in App is an all-in-one tool for managing attendance at events, practices, and club sessions. With it, you can quickly scan QR tickets or membership cards to check people in, track participation, and view a full history of attendance.

Click on the sections below to learn more.

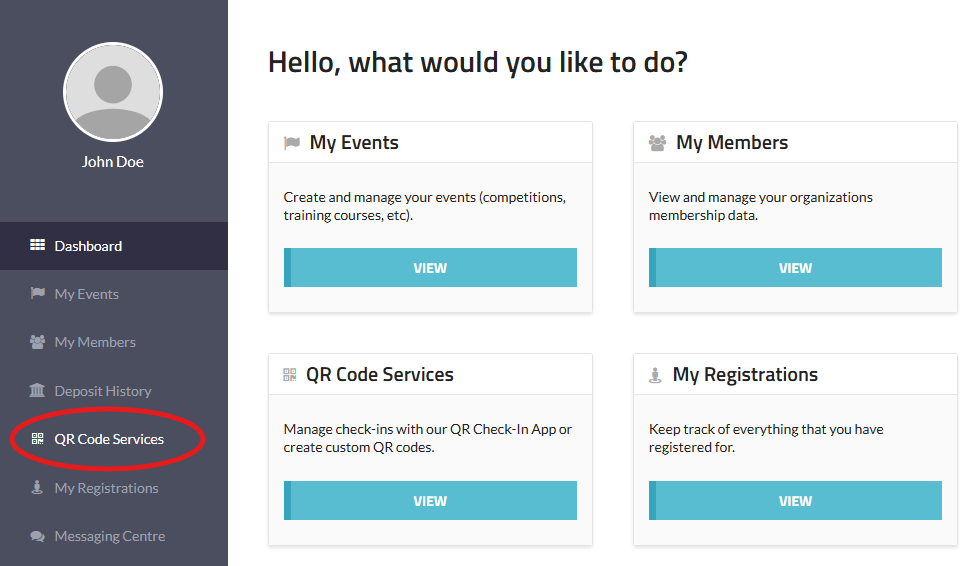
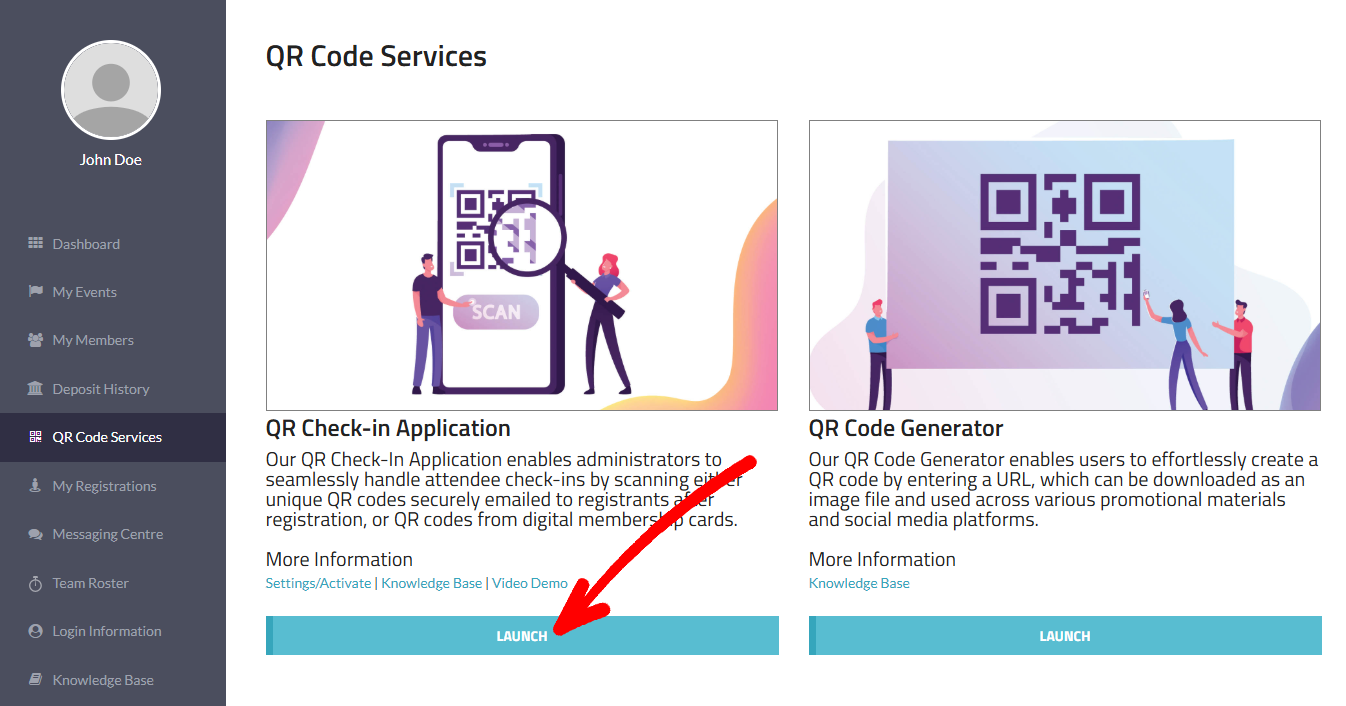
Enabling the QR Check-In App for your event or club is simple. First start by logging into your account and then navigate to the "QR Code Services" page found in the left side-menu.


On this page you can reach the QR Check-in App by clicking on the "LAUNCH" button.


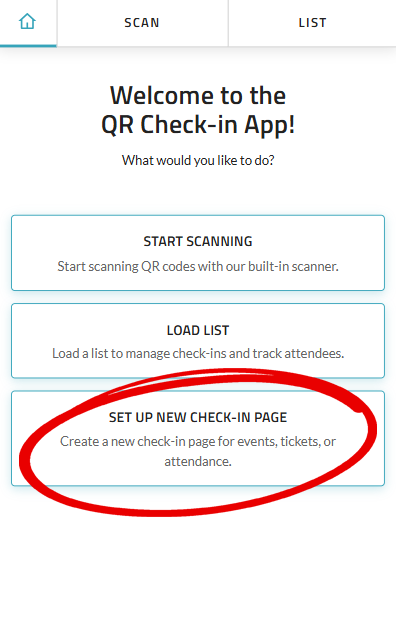
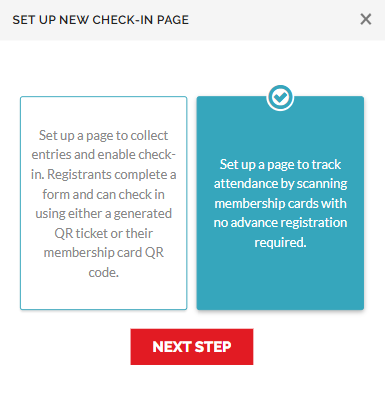
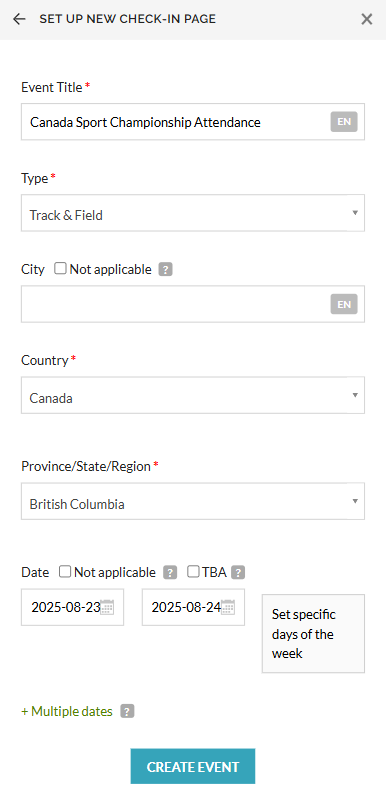
On the "Home" page click on the "SET UP NEW CHECK-IN PAGE" and this will give you two different Check-in page set up options:

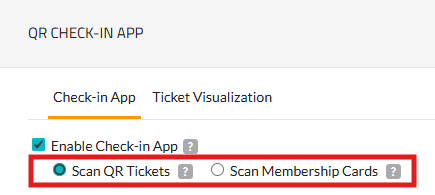
  • The left option lets you collect registrations through a form, and attendees can check in using either a QR ticket or their membership card.

    (+) Click here to show detailed information about enabling this check-in option.
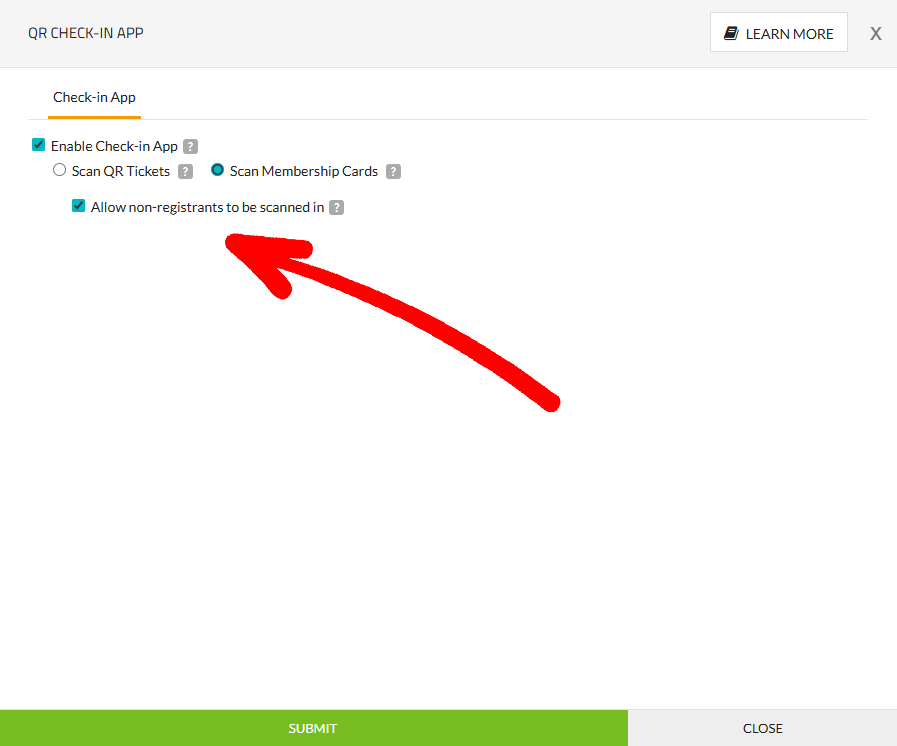
  • The right option is for tracking attendance only — you simply scan membership cards, and no pre-registration is required.

    (+) Click here to show detailed information about enabling this check-in option.


Last updated: August 25th, 2025
 

To start scanning tickets for your events, just follow these simple steps:

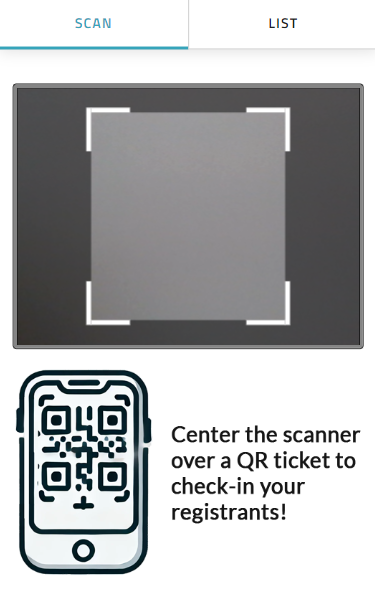
  1. Open the App: After logging into your account, click on the "QR Code Services" tab in the left side-menu. From there you can open the QR Check-in App by clicking on the "LAUNCH" button beneath the "QR Check-in Application" section. Once on the App, navigate to the "SCAN" tab.
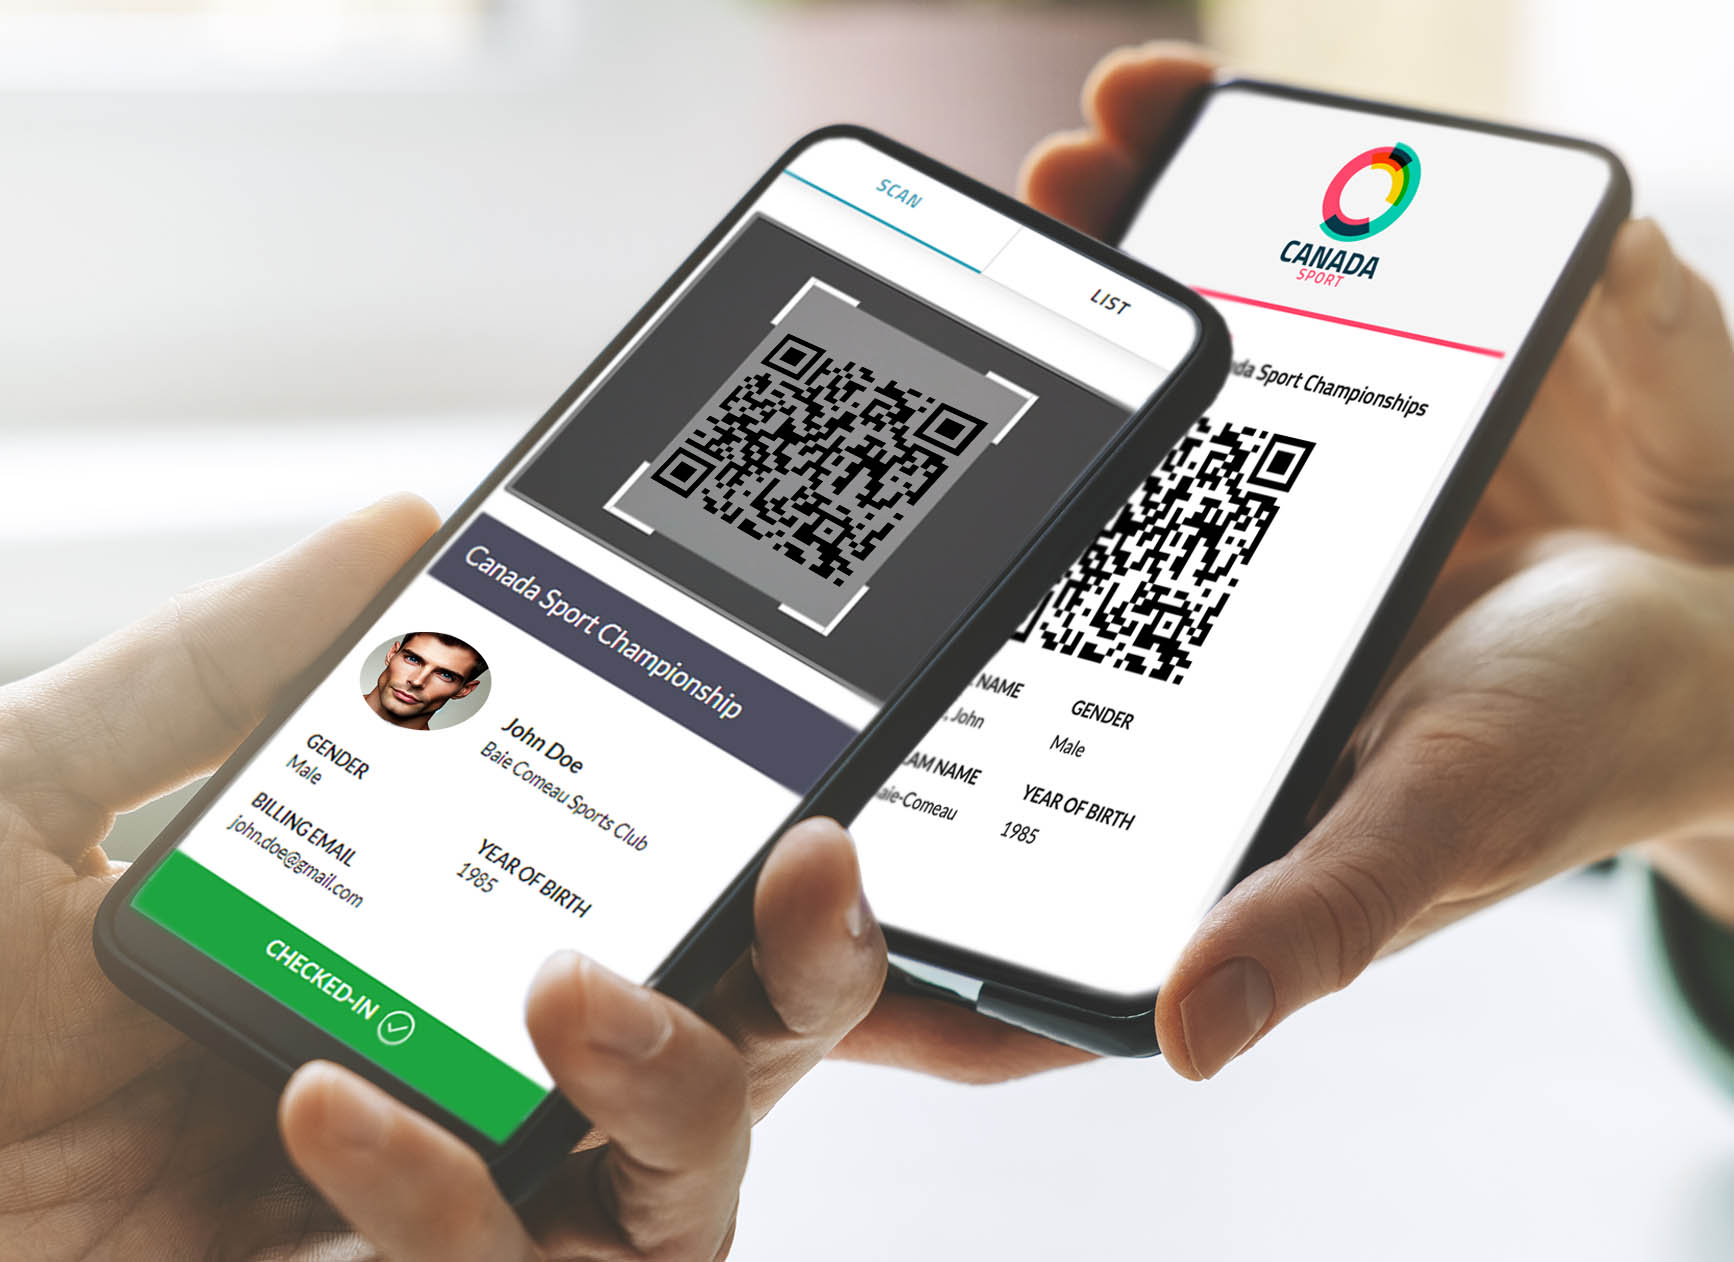
  2. Scan the QR Code: Align the QR code within the scanner frame on your device’s screen. The app will automatically detect and read the QR code.
  3.  
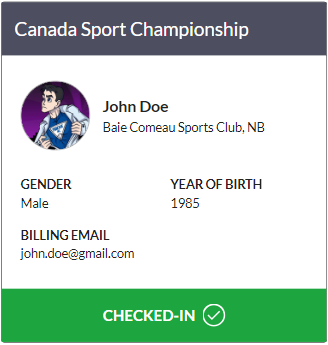
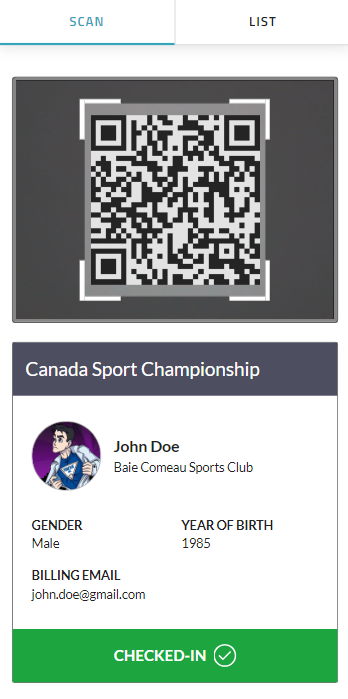
  4. View Information: Once scanned, the app will display the ticket details and check-in status.
  5.  
  6. Complete Check-In: If the ticket is valid and the status is "Pending", the app will update the status to "Checked-In". If the ticket has already been used or is expired, the app will display the corresponding status to inform the user.

The QR Check-in App is designed with robust scanning features to ensure a secure and efficient check-in process. Here’s an overview of the scanning capabilities:

Features
Security

Our scanner is built to recognize and accept only QR codes generated by our system. This protects users from potentially malicious QR codes by ensuring that only valid, event-specific QR codes can be scanned and displayed in the app.

Ticket Details

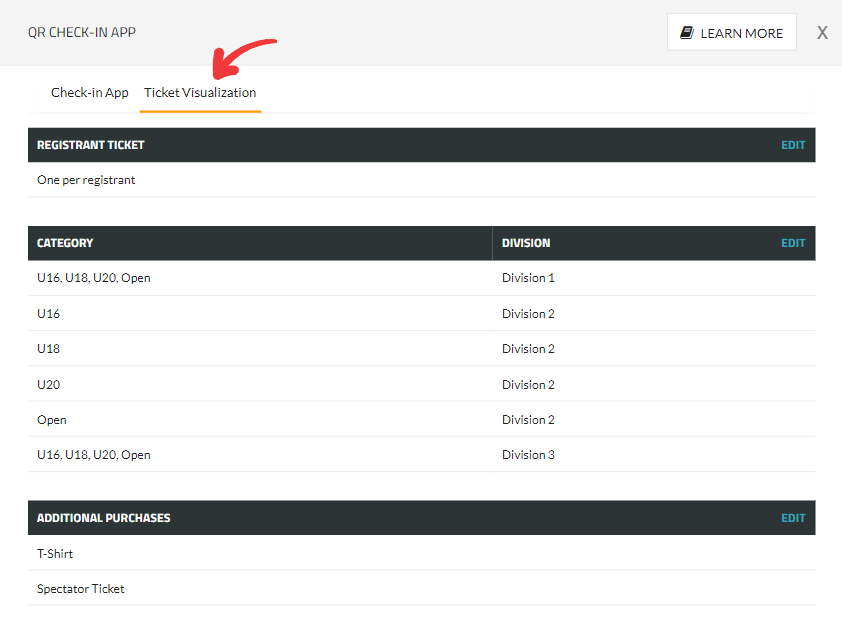
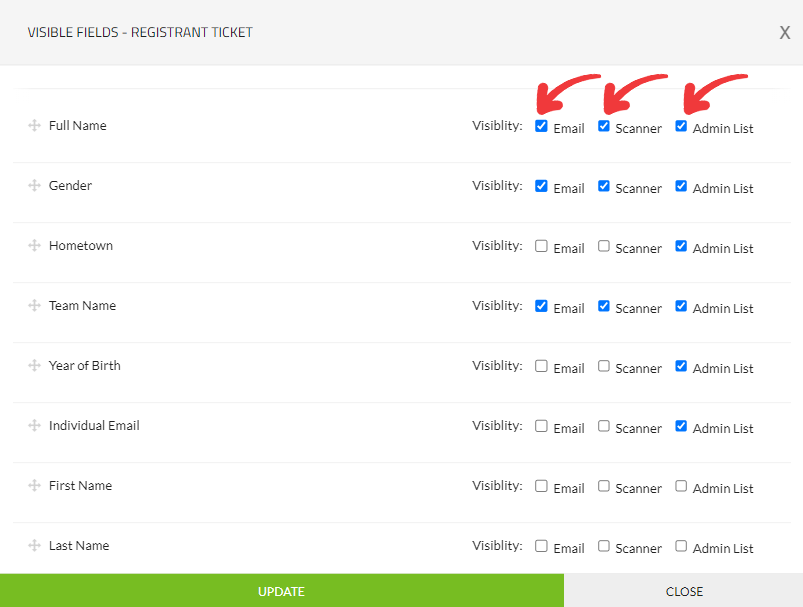
Upon scanning a QR code, the app displays essential information about the ticket, including what the ticket is for (e.g., event session, additional purchase) and who it is associated with (e.g., registrant’s name). As an admin you can choose what information is shown for each type of ticket (for more information check out the "Editing QR Tickets and Visible Fields" section in Enabling the QR Check-in App).

Check-in Status

The app also shows the current check-in status of the ticket, providing real-time updates to ensure accurate tracking of attendees. The ticket status has the following options:

  • Pending: Indicates that the ticket has been issued but not yet used for check-in. This status is shown for tickets awaiting the participant's arrival.
  • Checked-In: Confirms that the participant has successfully checked in using the ticket. This status updates in real-time upon scanning.
  • Already Checked-In: Alerts that the ticket has already been used for check-in, preventing duplicate entries and ensuring one-time use.

    ** NOTE: The "Already Checked-in" status applies only to QR Tickets, not Membership Cards. While QR Tickets can be scanned more than once, they were designed with the intent of being used like one-time tickets. **

  • Expired: Shows that the ticket is no longer valid, either because the event has ended or the ticket’s validity period has passed.


Last updated: August 25th, 2025
 

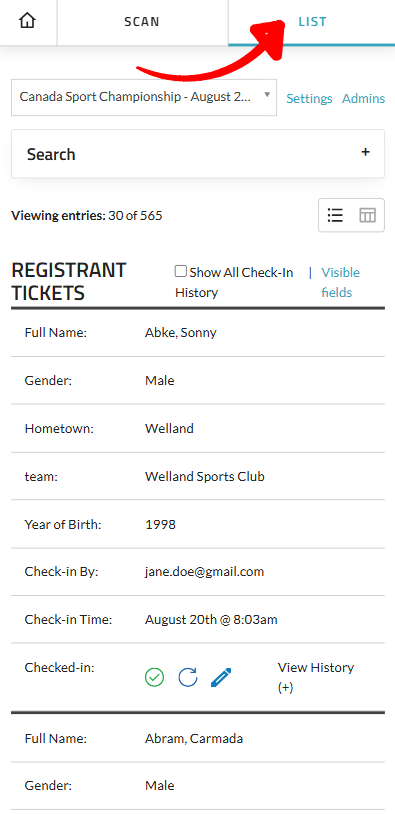
To access your event’s QR ticket list, open the QR Check-In App and navigate to the "LIST" tab.

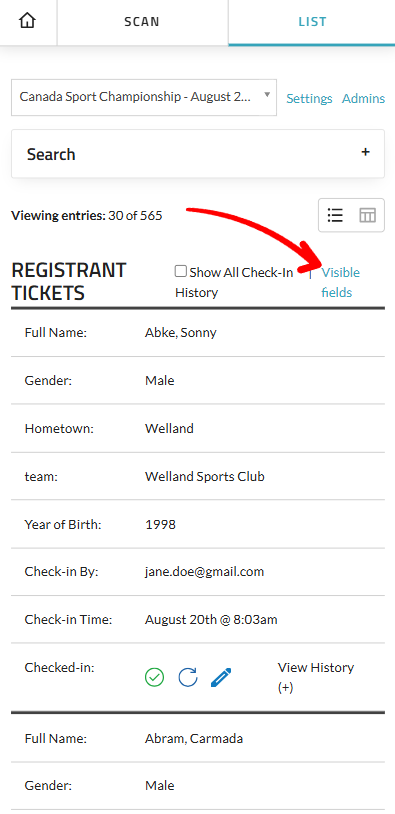
The QR Check-in App’s List feature allows event organizers to manage and view all registrants associated with their tickets. Below is what the interface to manage your QR tickets list looks like.

1. Event Selection
Users can select which event's tickets they want to view, making it particularly useful for organizers managing multiple events. The app will automatically display tickets for any event happening today.

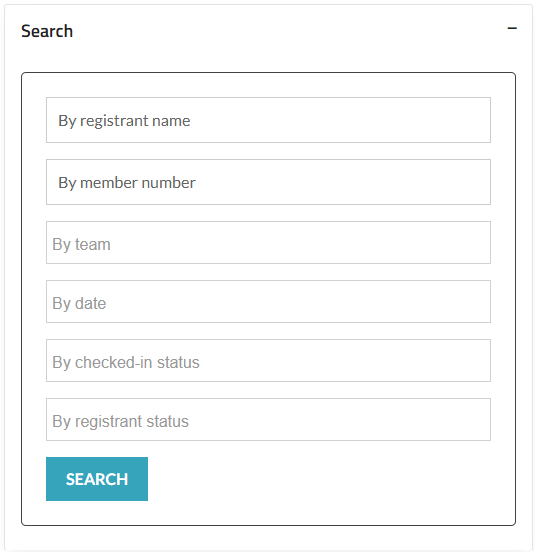
2. Search Filter
Users can filter the registrant list based on various criteria such as the registrant's name, individual events, age categories, team/club names, and checked-in status (Checked-in or Pending). This enhances the search functionality, making it easier to find specific registrants or groups and streamlining the check-in process.

Note

The filtering fields "By member number" and "By registrant status" only apply to check-in pages that scan membership cards.

3. Visible Fields Customization
Admins can use the "Visible Fields" link to customize which information is shown on email tickets, when a ticket is scanned, and in the List view. This provides flexibility to display relevant information tailored to the event's needs.

Note

The "Visible fields" link is NOT available for check-in pages that scan membership cards.

4. Special Fields
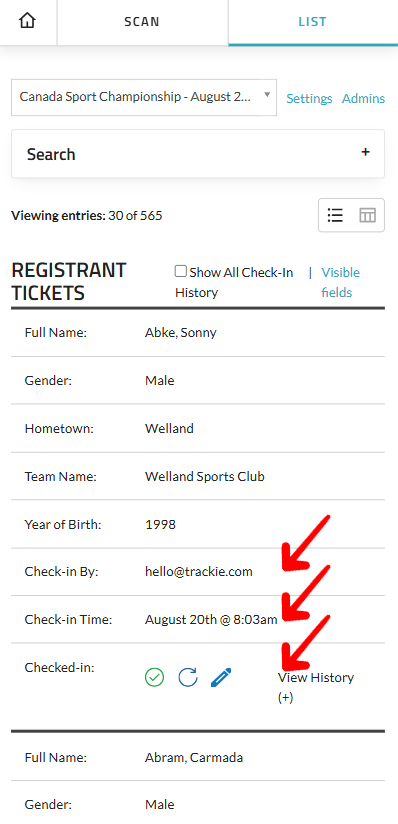
In the List view, three special fields are always displayed: Checked-in By, Check-in Time, and Checked-in status. Admins can change a registrant's checked-in status directly from the List view by clicking on the Checked-in icon.

5. Re-send Ticket Option
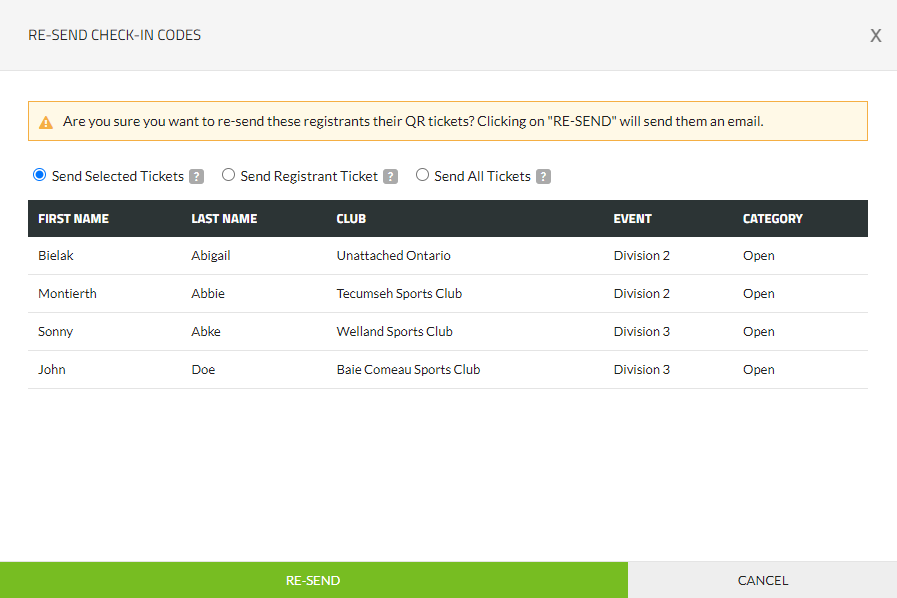
Admins can re-send any individual ticket by clicking the re-send icon next to the registrant’s details. The app allows the admin to type in an email address, with the registrant's preferred email pre-populated for convenience.

6. Real-time Updates
The List view automatically refreshes every few seconds to ensure that the displayed information remains up to date, even if multiple people are scanning registrants simultaneously.

7. Removing Entries
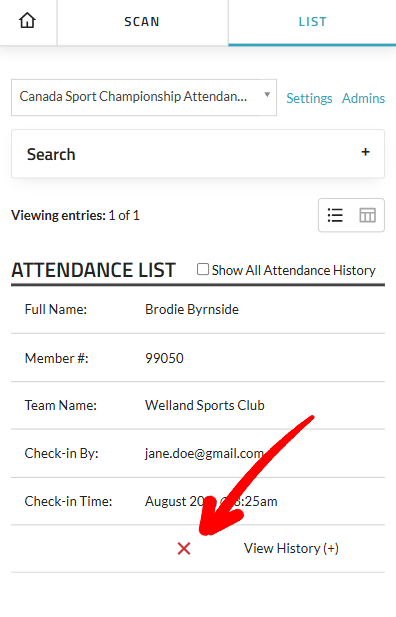
When you create a check-in page that tracks attendance only and has no pre-registration, removing entries can be done directly from the check-in app in the "LIST" view by clicking on the red "X" next to their entry.

However, for events that have the Check-in App enabled on them, to remove a registrant go to the event’s View Registrants page and delete them from there.

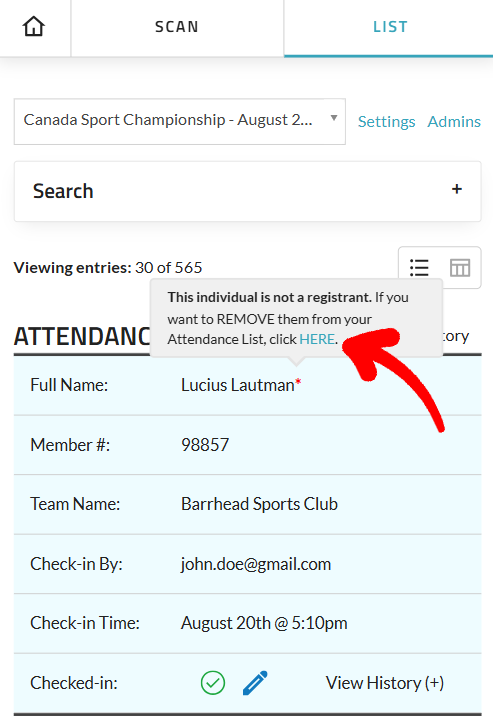
For events that have the Check-in App enabled, if you’ve enabled the "Allow non-registrants to be scanned-in" option, you can remove these non-registrants by hovering or tapping the orange star next to their name and clicking the "HERE" link in the tooltip that appears.

8. Check-in History
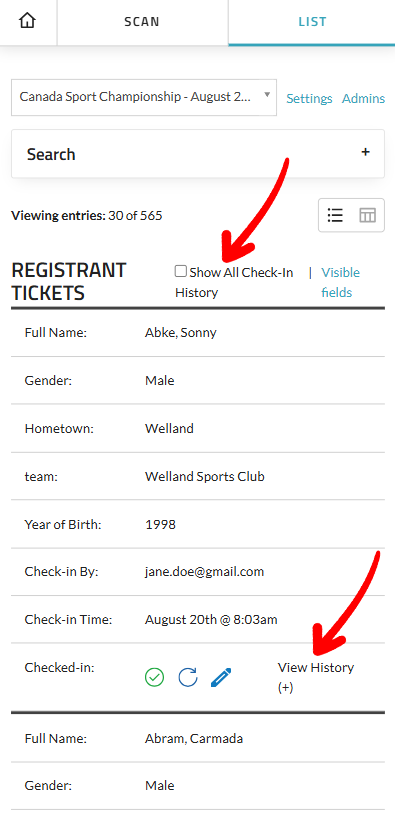
The QR Check-in App now records a complete scan history. QR tickets can be scanned multiple times, and each scan logs the date/time, the admin who scanned it, and the status applied. To view an individual’s history, click “View History (+)” on their row. To expand everyone’s histories at once, check “Show All Check-in History.”

9. Check-in Calendar Overview
At the top of the QR Ticket List, you can choose between two views: List View and Check-in Calendar Overview . Use List View to manage all check-in actions and details for each participant. Use Check-in Overview for a quick snapshot of each participant’s check-in activity within the event’s date range. In the calendar overview you can hover or tap any check-in icon to see which ticket was scanned and the exact time.


Last updated: August 25th, 2025
 

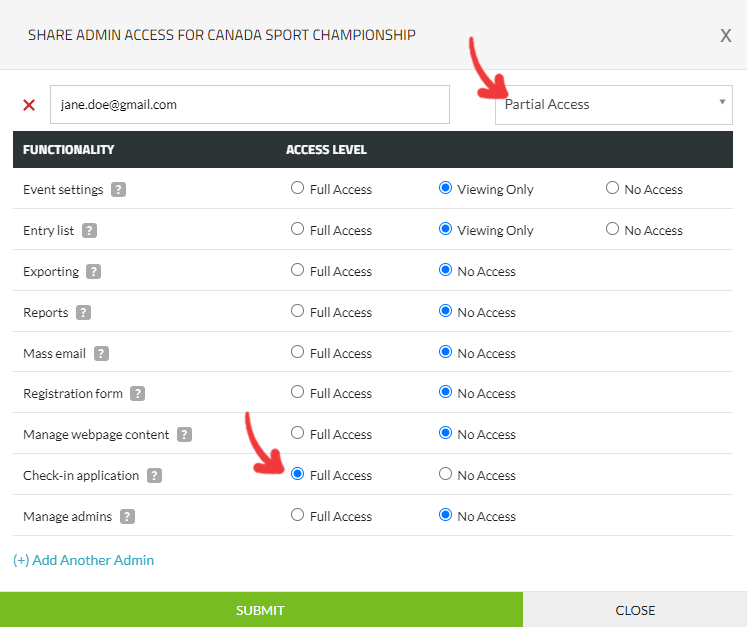
Event organizers can delegate administrative responsibilities by granting other accounts admin access to the event's check-in app. This feature is accessible through the "Admins" popup under the "Check-in application" option.

Making use of the “Partial Access” option can be particularly useful when providing admin access to the QR Check-in App. For example, if you have volunteers checking in athletes, they can access the Check-In App without needing full access to the rest of your event’s settings.


Last updated: August 25th, 2025
 

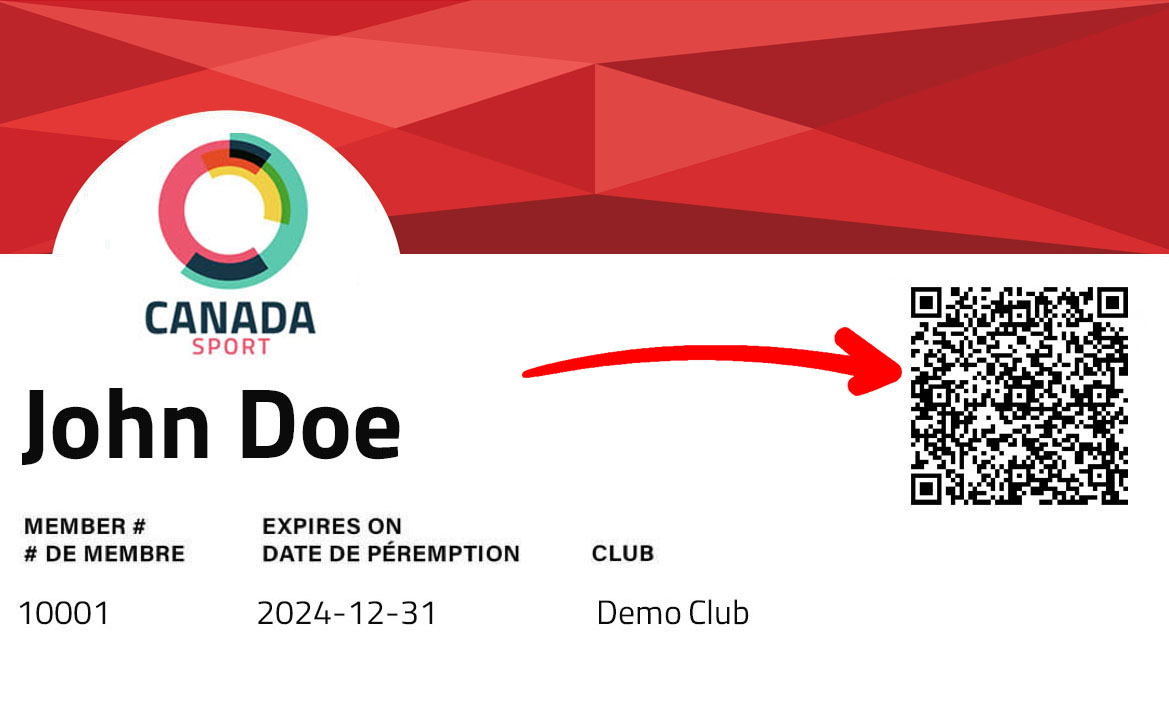
Both QR tickets and membership cards serve the same purpose: giving participants a scannable code to check in. Whether someone misplaced their original ticket or simply needs to use their membership card instead, this section shows you how to quickly get those QR codes back into their hands.

  • Re-sending QR Tickets

    (+) Click here to show detailed information about this option.
  • Accessing Membership Cards

    (+) Click here to show detailed information about this option.


Last updated: August 25th, 2025
 

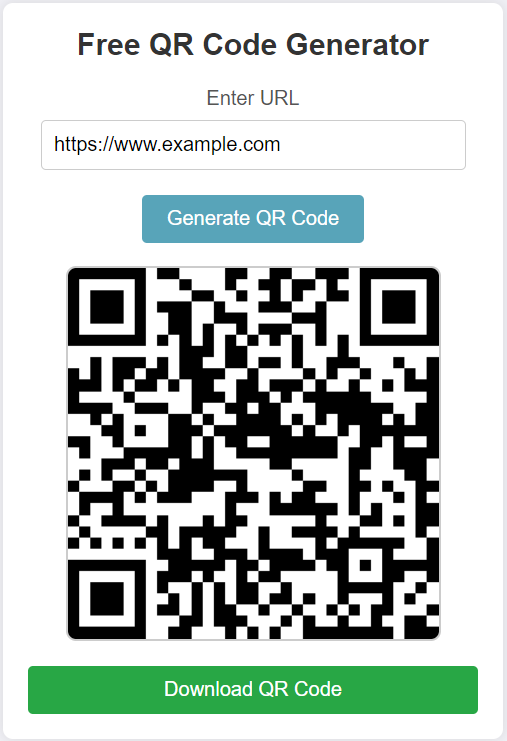
Our QR Code Generator enables users to effortlessly create a QR code by entering a URL, which can be downloaded as an image file and used across various promotional materials and social media platforms.

To start using the QR Code Generator, simply navigate to the "QR Code Services" page which can be found in the left side menu or in the "MY ACCOUNT" drop down menu. From here you can launch the QR Code Generator.

On this page you can enter any URL you would like to create a QR code for in the text field, provided it begins with "http://" or "https://". Once you've entered your desired URL, click on the "Generate QR Code" button and watch as your QR code is immediately created! To save the QR code to your device, you can now click on the green "Download QR Code" button.


Last updated: August 30th, 2024